Smart lists take the strain out of managing and mainting your Compleat security profiles.
If you've already created security profiles, you'll know that keeping on top of them can becoming a long-winded task - especially if you've had to create a lot of them. Smart lists make life easier by overriding the access rights within a group of security profiles, giving you control from one place. Your completed smart lists sit in the Security Profiles area of Compleat.
In this guide, we tell you why you might create a smart list, and show you how to easily create one to keep your company's security profiles in check.
Do I need a smart list?
Smart lists are useful in situations where you want to apply the same code restrictions to several security profiles.
For example, there might be several departments within your organisation that need access to the same list of nominal codes, but need differing access to cost centres. Or, you might want multiple departments in your organisation to have access to a restricted list of suppliers.
Rather than having to configure the same list of restricted nominal codes or supplier codes for each individual security profile, you can set up a smart list to do the work for you. The smart list will allow you to maintain that list of restricted codes in one easy, accessible place.
Create a smart list
It's quick and easy to set up a smart list. You need to first create the smart list, and then direct the relevant security profiles towards the list.
Here's how.
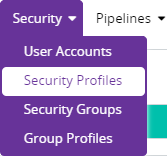
- In Admin Home, go to Security, and click Security Profiles.
- In the top-right, click Create new.
- Enter a Security profile description.
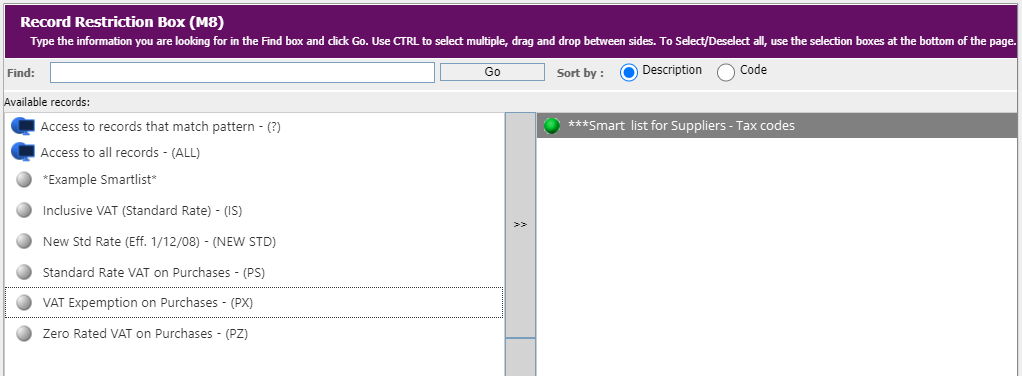
We recommend that you add *** as a prefix. This will help you quickly identify your smart list in your list of security profiles. Eg. ***Smart list for Suppliers - Tax codes.

- Select the Company your smart list will be available to.

- Under Layout, select *SMART LIST*.

- In the grid, click an analysis field.

- In the Record Restrictions Box, configure your desired restrictions for the smart list in the same way that you would for a security profile, by dragging codes from the left to the right.
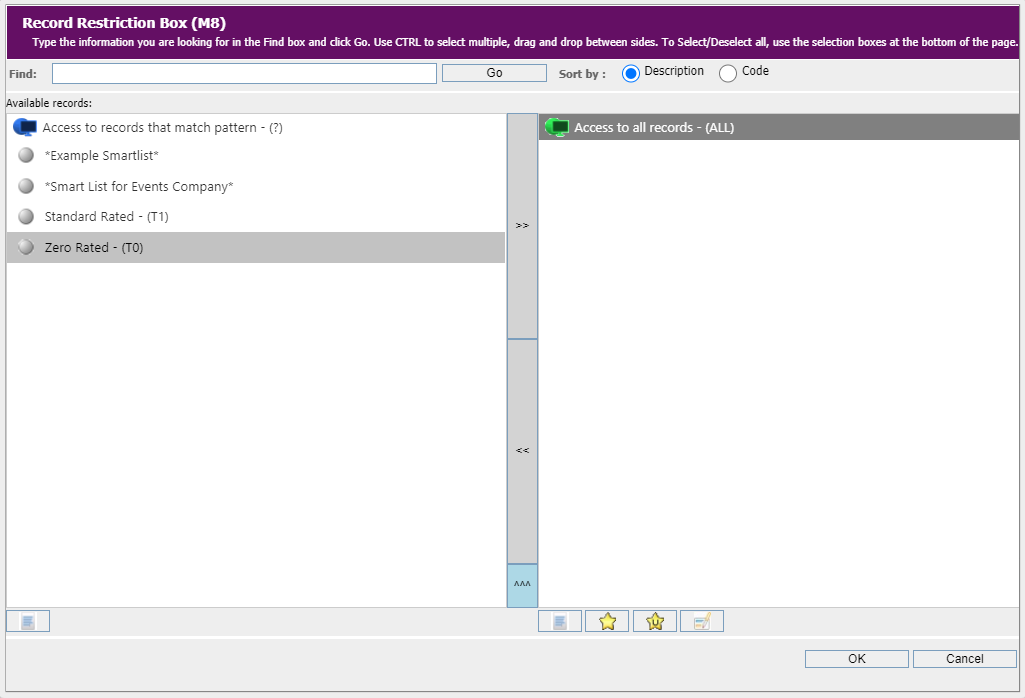
- Click OK.
- Click Save.
- Your smart list is created!
You're nearly there. The final step is to direct the relevant security profiles towards the smart list.
Direct security profiles to a smart list
Here's how you tell Compleat which security profiles you'd like to use your smart list.
- Return to the Security profiles area, and click a security profile that you'd like to assign to the smart list.
- In the grid, click on the field that contains the code restrictions you've set up in the smart list.
- The Record restriction box appears.
Drag Access to all from the right to the left.
Drag the smart list from the left to the right.
Drag indivual records from the left to the right to grant access to the smart list, plus the individual codes.
- Click OK.
- Click Save.
- Repeat these steps for each security profile you need to direct to a smart list.
- Nice job!
You've successfully directed the relevant security profiles to your smart list. The security configuration in your smart list now overrides the configuration of the associated security profiles.
You can now access your smart list from the grid in the Security Profiles area.
Managing your smart list
Now that you've got a smart list with security profiles directed towards it, you only need to make any desired adjustments to coding restrictions in one place: your smart list.
To add or remove analysis codes to list of restrictions within a group of security profiles, simply open your smart list from the Security Profiles area, and make your desired changes. All of your changes will be automatically applied to all of the security profiles associated with the smart list.