Admin Home > Approvals > Approval Selectors
Approval selectors look for conditions in the header data of a transaction to determine which approval chain to contact.
Create an approval selector by department
A good use of approval selectors is to determine which department the transaction is related to.
Follow the guide below to customise a selector by department. This same process can be used to define transactions by other data sets available from the data extracted in the transaction header.
- In Admin > Approval > Approval Selectors, click Add New Approval Condition.

-
Click the Condition Field Name drop-down.
Make a selection from this drop-down that you can define a department by.
In this instance, we can choose the Department field.

-
Choose the Conditional Range value.
In this example, we want to define this selector by our finance department.
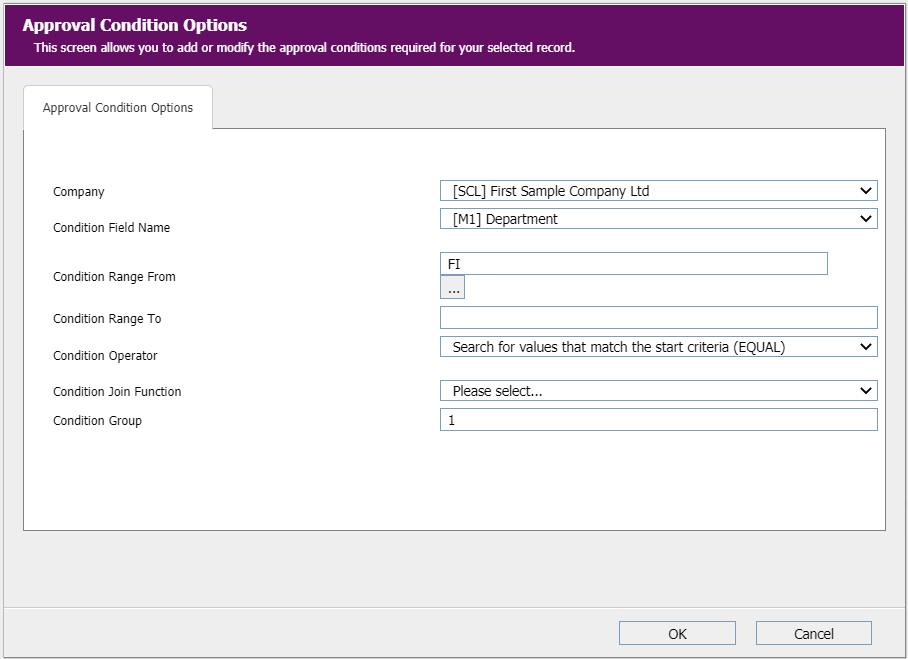
We will type "FI" into the field.

-
Select the Conditional Operator to match the start of the criteria.
This means the option below will match upon finding any invoice starting with a department of "FI" as the value.

- The criteria should look like the image below.
Click OK.
Well done! You have just created a new selector and customised it's criteria from the transaction's header data. This can be replicated for other departments or teams in your company to send specific transactions for approval.
Order your selectors
It is important to consider the order in which your selectors are ranked in. If a department is above another in the top-down selector order, then the selector at the top could catch and send transactions down the wrong approval chain.
If the selector for a marketing team is ordered above the IT department, and if marketing were to raise a PO for IT equipment, this will result in the transactions being sent down the marketing chain for approval rather than IT, even with the nominal set as "IT Hardware".
To fix this issue, the IT selector should be ranked above everything else in the order of selectors. This will ensure that anything coded specifically for IT Hardware will go to IT for approval.
From a selected approval profile, you can alter the order of the selectors.
- Go to Admin > Approvals > Approval Profiles, click to open an Approval profile.
- Click the checkbox to the right of a Selector.
- Click the Move Up or Move Down tabs to move the selector in your order.

- Click Save Record.